


Blog 
Click here to go back
How to Show Discounts Given on Customer Invoices
Discounts are common in many businesses. Discounts for special events, special customers, or special payment terms. Just as there are a variety of reasons for granting discounts, there are various ways to create them in QuickBooks.
Let’s start with a simple method to give a customer a discount directly on an invoice. We can create a Discount type item.
You want to use discount items for one-time or occasional events. In cases where a discount is always granted a certain customer, or a discount given due to payment within a certain time frame are more efficiently handled in other ways.

The above screenshot shows the setup screen for a Discount type item. The following screenshot, shows the item setup screen after all the pertinent information is entered.
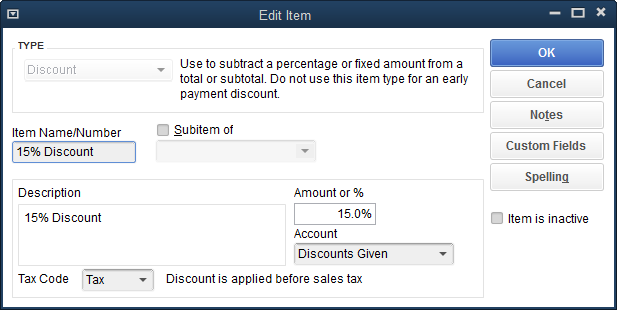
You must decide if the item, by default, is taxable or not. This is important. If you use the discount item to reduce the price of taxable items and the discount item is set to a non-taxable code, sales tax will not be reduced as a result of the discount.
No worries though, the sales tax code can be changed either way with each invoice where the discount item is used. So, just use the setting that would be appropriate most often.
Another setting is the account from the chart of accounts to which the discount item will post. This can be the same income account to which the items you normally sell post. Or, you can create a special income type account to track the amount of discounts. In the graphic of the Discount item, this latter approach was used. The discount amount will post to an income type account called, Discounts Given.
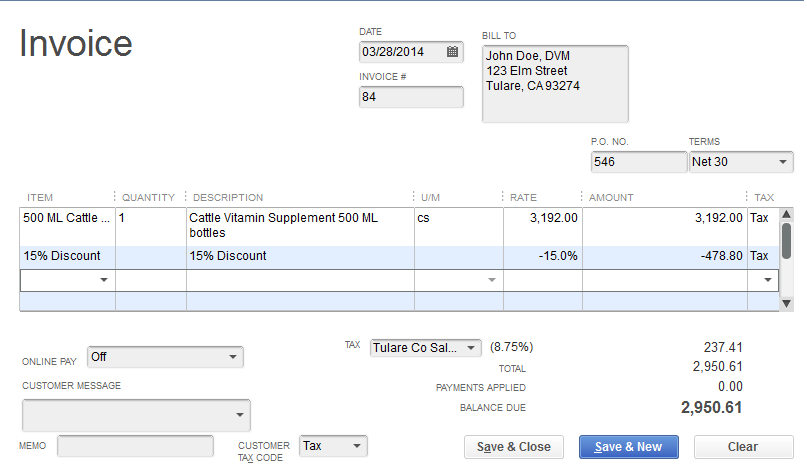
The invoice above shows an invoice using the new Discount item. A nice way to expand on its use is to add a subtotal after the discount showing the net price.

You can see that adding the subtotal line makes this appear a little better to your customer. They now can see the price of the merchandise before sales tax, but after the discount you’re giving.
The subtotal becomes critical for more complex invoices. For example, perhaps several lines need to be discounted, several lines do not.
The discount item in QuickBooks discounts the line immediately above it. If there are three lines of merchandise and/or services, then the discount item is used on line four, the discount is computed on line three only.
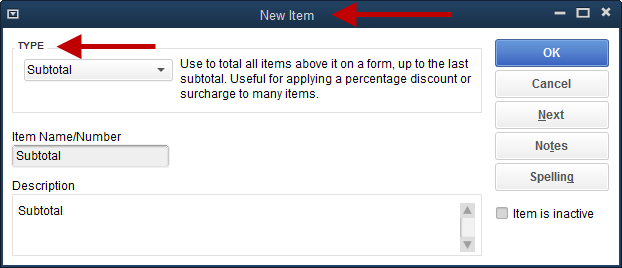
In order to discount the entire amount, use a subtotal item on line four, then the discount item on line five. Now the discount will apply to the entire amount.
That’s a good overview of adding a simple discount to an invoice. Next time, we’ll look at some of the other ways to create a discount for a particular purpose in QuickBooks, and do it with less manual input.