


Blog 
Click here to go back
You Create the Customer Invoice. No, You Do It

Use QuickBooks’ Tools to Make Invoicing Easy
In a previous post, we reviewed QuickBooks’ ability to create a simple project budget based on the Estimate form. In this post we’ll focus on some additional tools in QuickBooks that can make invoicing customers easier.
Creating an estimate in QuickBooks is an optional step. An invoice can be created without having used the estimate form at all. If an open estimate exists for a certain Customer:Job, when you begin an invoice for that Customer:Job, QuickBooks will ask if you want to use the estimate as a basis to begin the invoice.

You can see the estimate listed in the popup window in the screenshot above. If more than one estimate had been created for the job/project, all the open estimates would appear here and you would be able to select which one you were using as the basis for your invoice.
Select the estimate (if there are more than one), and click OK. What happens next depends on your Preference settings.
If this is turned on in Preferences (Edit->Preferences->Jobs & Estimates->Company Preferences->Do you do progress invoicing?), once you select the estimate to use for the invoice, the following message appears.

At this point, there are more options to choose from. QuickBooks allows you to create several invoices from one estimate. So your agreement with your customer may be to invoice at certain points of the project’s completion. QuickBooks will help you keep track of that process.
Let’s review the choices. One is to create the invoice for 100% of the estimate. That’s easy and does not involve the progress invoicing ability at all.
Two, is to create an invoice for a specific percentage of the job. 25%. 50%, whatever you choose. Each line of the estimate is invoiced for that percentage.
Third, is to specifically select the items from the estimate that will be invoiced. Let’s look at that option.

Above is the table QuickBooks opens when choosing the third option described. The arrow points to the column where you would select those items to be included on the current invoice. In the example, a bathroom remodel is being done. The customer is to be invoiced for tearing out the old fixtures, new framing, and the electrical work.
Note the circled column headers. If we had created an invoice for this project before, the amounts previously invoiced would show here and would not be available to invoice again.
With the items presently selected, this will be a $1715.00 invoice.
More possibilities for invoices in QuickBooks
A feature in QuickBooks often used by companies in service-based enterprises is the ability to track time and expenses and then easily invoice those to a customer without a lot of additional manual entry. Let’s see how that works.
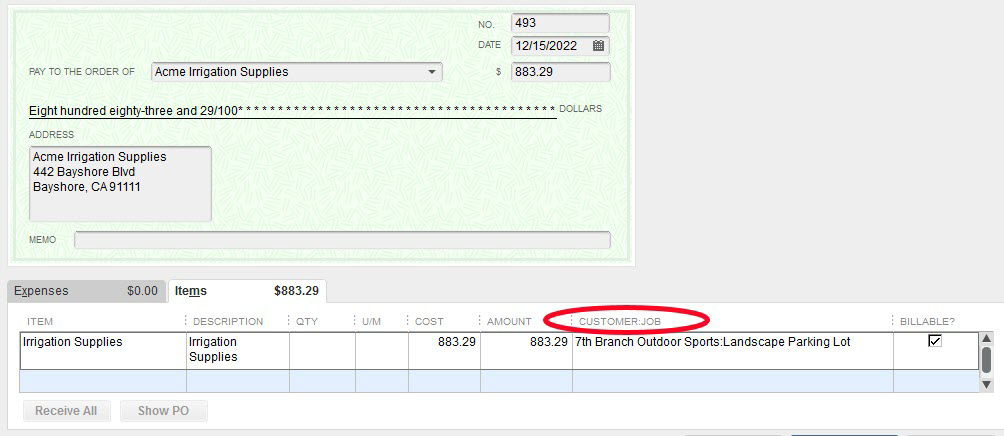
The most important part of the above check is the Customer:Job entered and the checkbox Billable with the checkmark in it. Additionally, the fact an item was used rather than Expense helps with some job reports, but that’s another topic for another day.
Before we invoice our customer, let’s add some time to the job.

Again, the most important part about this process is that a Customer:Job name is included and the Billable box is checked.
Now, let’s invoice the customer.
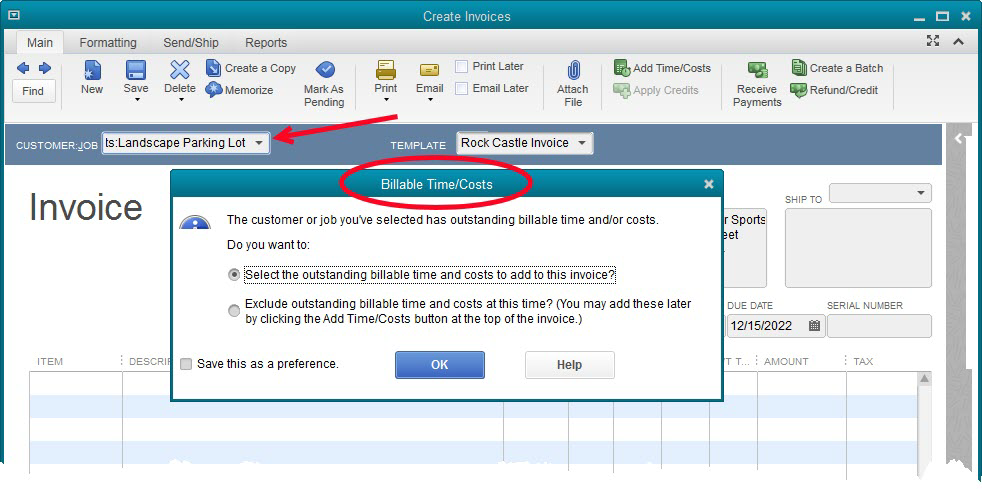
As soon as we enter a Customer:Job with outstanding billable time/costs, QuickBooks asks us if we want to invoice those items now. In this case we do.
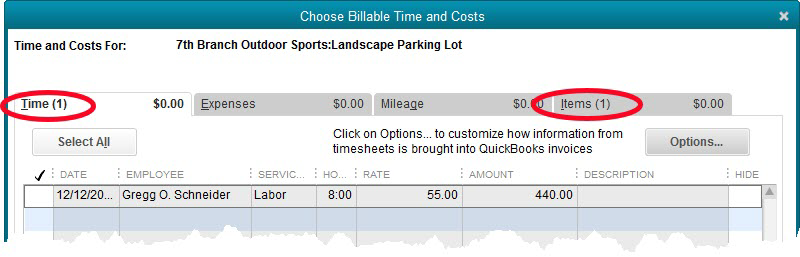
We have both time and an item to add to the invoice. These are the entries we made with the check and the timesheet. There are more options for those that use this feature. For now, we’ll select both entries and click the OK button (not shown) at the bottom of the window.
Here is the resulting invoice.
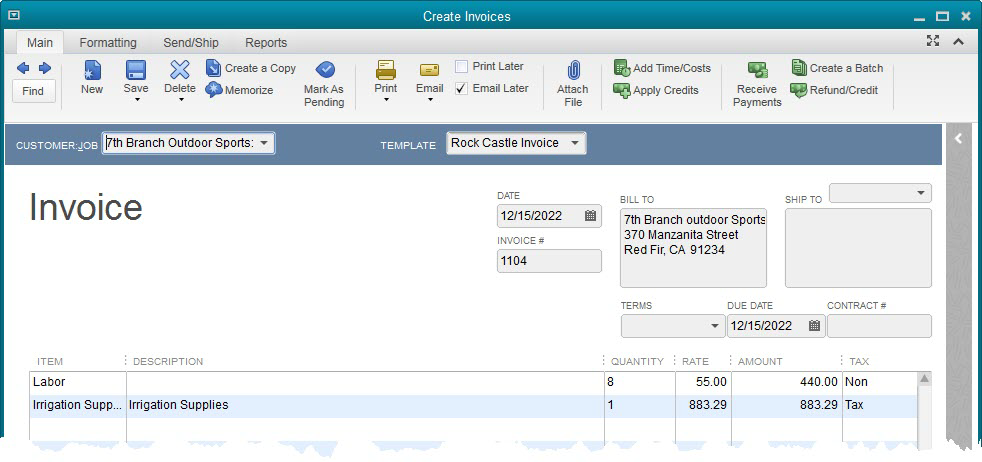
The billable items are added to the invoice. Labor is invoiced at $55 per hour because that is the sales price in the item setup. The amount for the irrigation supplies carried to the invoice at cost since there is no sales price setup for this item. In a case like this, the markup would have to be determined and the invoice amount edited to reflect that.
Two more quick invoice tools useful to service providers
Invoicing for a service provided on regular schedule, say monthly or weekly, is common. It is possible to Memorize an invoice. This memorization would include the customer name, so a memorized invoice transaction would have to be created for each customer on a repeated schedule like this.
Create the invoice as normal. Click the Memorize icon just to the right of the big Delete X icon. Choose how often you want the invoice repeated. Weekly, monthly, etc.
QuickBooks will remind you the first time you open QuickBooks on or after the date the memorized transaction should be entered. You have the opportunity to accept or reject the entry of the invoice at that point.
The other invoice tool we want to include today is Batch Invoicing. This is accessed from the Customer dropdown menu, Create Batch Invoices. This tool allows you to create a ‘batch’ of customers that should each receive basically the same invoice. You will be invoicing the same item and the same price for each customer. QuickBooks will create an individual invoice for each customer.
If there is a difference from one customer to another in, say, sales tax, or delivery method (email or printed), QuickBooks will pick up that information from the customer file and customize the invoice for that particular customer.
QuickBooks has some really great features that simplify the job of tracking project expenses and invoicing customers.