


Blog 
Click here to go back
QuickBooks Own Book of Lists
An integral part of tracking hundreds of transactions within a computer program like QuickBooks, is lists. Lists of customers, of vendors. Lists of things we sell, of accounts used for creating financial reports. And on and on.
There are similarities in managing the lists in QuickBooks. This post comes from the Lists sections of the Basic QuickBooks class we offer a few times each year.
Not all, but many lists are available on the Lists menu.
Let’s start with the Chart of Accounts, one of the most basic and important lists in QuickBooks.
Once the Chart of Accounts is chosen from the Lists menu, right-click on one of the accounts and a popup menu appears.
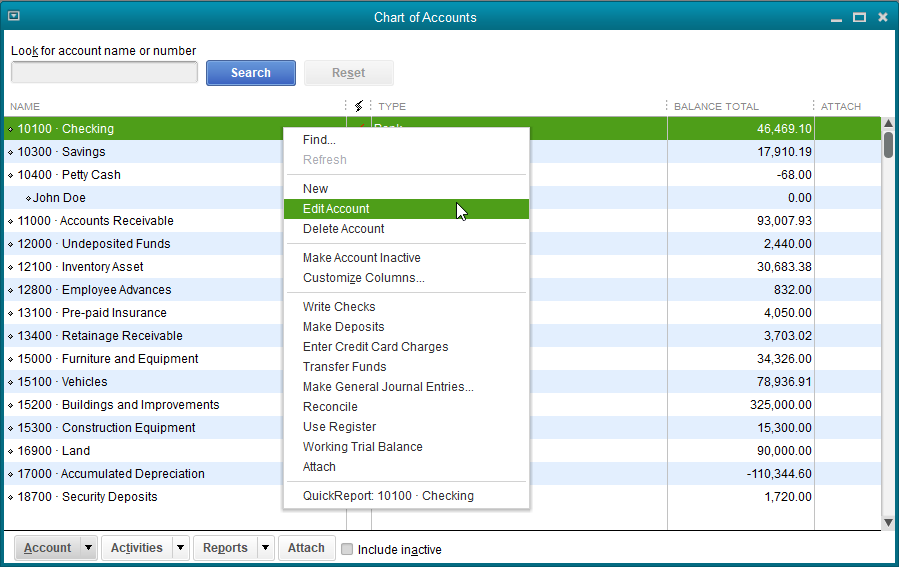
The Checking Account is selected. From the popup menu, we’ll choose Edit Account…

And change the name to Cash in Bank.
You can change account names at will and not impact any of the transactions. In other words, those transactions are all still there. The bank balance is still the same. It’s just that all past transactions now carry the new name as will future transactions.
Other lists can be edited much the same as the chart of accounts. Vendors and customers are each displayed in the Vendor Center or Customer Center. A double click on the name will open an edit window.

Much of the information in the vendor or customer names is easily entered and the procedure is pretty easy to follow. The tabs down the left side of the edit window identify different sections of data that pertain to the selected name.
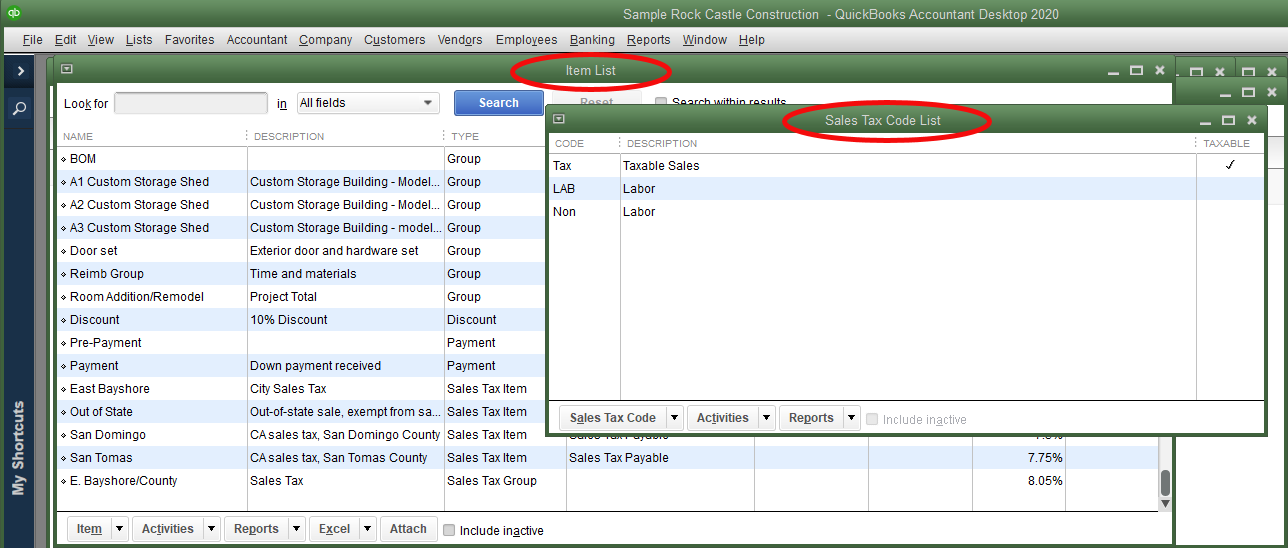
One special area for vendors is Tax Settings, where information needed to create 1099s is stored. Similarly, customers also have a special tax area. In this case, it is for sales tax information that is necessary for QuickBooks to charge the correct amount of tax on an invoice.
There are two common challenges with lists in QuickBooks.
One, you no longer need a name on the list. This happens when a customer moves away, you no longer buy from a certain vendor, etc. If the name has been used in a transaction in QuickBooks (and that’s usually the case), the name can’t be deleted.
Two, you end up with duplicates. William Smith and Bill Smith as customers for instance. If there are transactions for both (and again, there usually are), you can’t delete either one of them.
Let’s make a customer inactive. We highlight the customer in the Customer Center and right click on the customer name. This brings up a popup menu where we make the appropriate selection.

The customer will no longer appear on lists in QuickBooks either in the customer center or when creating customer transactions like invoices. They should have a zero balance before you make them inactive. If they don’t, and you run a report showing customer balances, they will still be on the report since they owe you money.
You can always get these customers back if you need to.
To get rid of duplicates, we usually merge the extra name. Let’s use a vendor.
Rock Castle Construction has a vendor C.U. Electric. The owner of the vendor business is named Hughes. It seems someone was confused and created a vendor, Hughes Electric. Both vendor names in QuickBooks have transactions and both have a balance due.
The easiest way to fix this is to edit the Hughes Electric vendor to be the exact same name, including spaces and punctuation, as C.U. Electric. When we save the vendor file after editing, QuickBooks displays this warning:
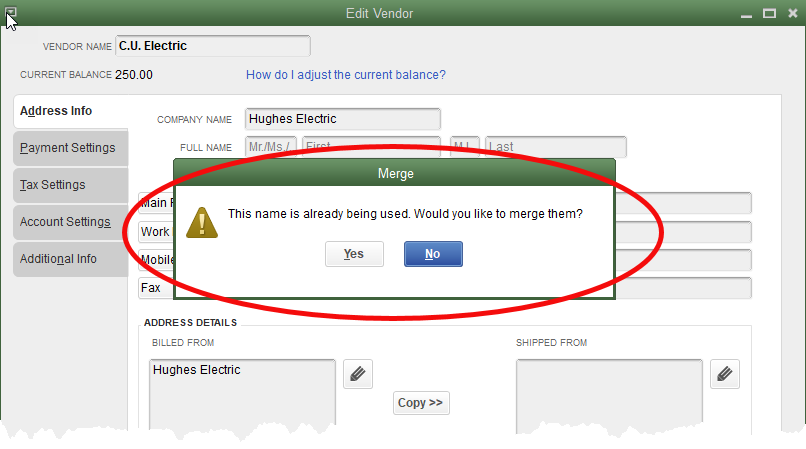
QuickBooks gives us this chance to change our mind since this is a permanent change. There’s no going back.
If you’re certain the merge is appropriate, click yes at the message and QuickBooks completes the process. All transactions in QuickBooks that used to show Hughes Electric as the vendor now show C.U. Electric.