


Blog 
Click here to go back
Making an Invoice of Your Own

Adding the Company Phone Number to an Invoice Template
A fact that many QuickBooks users do not know is that various forms used in QuickBooks can be customized. In today’s post, we will add a company phone number to a printed invoice template.
There are two ways to access this capability. One is from the list of templates at Lists->Templates. The other is from the window of the form itself.
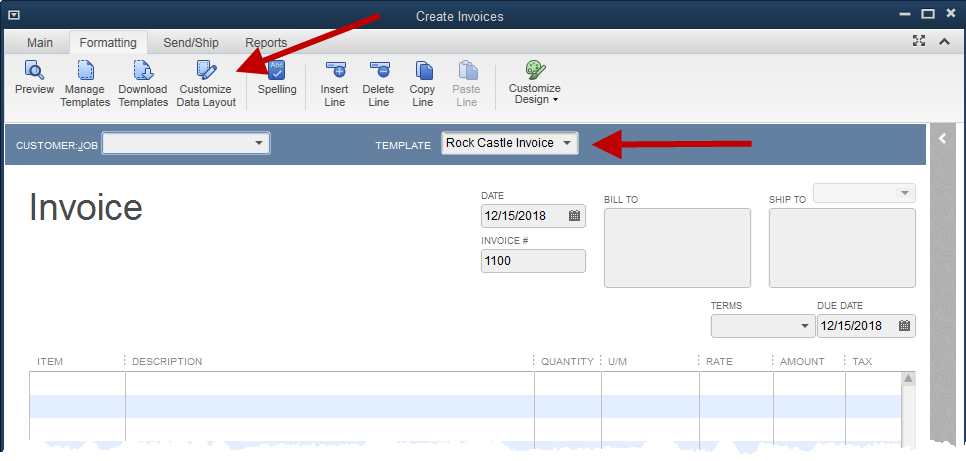
The above graphic shows the window for creating a new invoice. Look at the second arrow. It points to the field that identifies the template being used for this invoice transaction. This field will always be available on any transaction window where the form can be changed or customized.
The template can be changed at any time. It will not change the transaction. It is merely a different way of viewing the same transaction.
The top arrow points to an icon on the Formatting tab of the transaction window ribbon. This icon will open the customization options for this template.
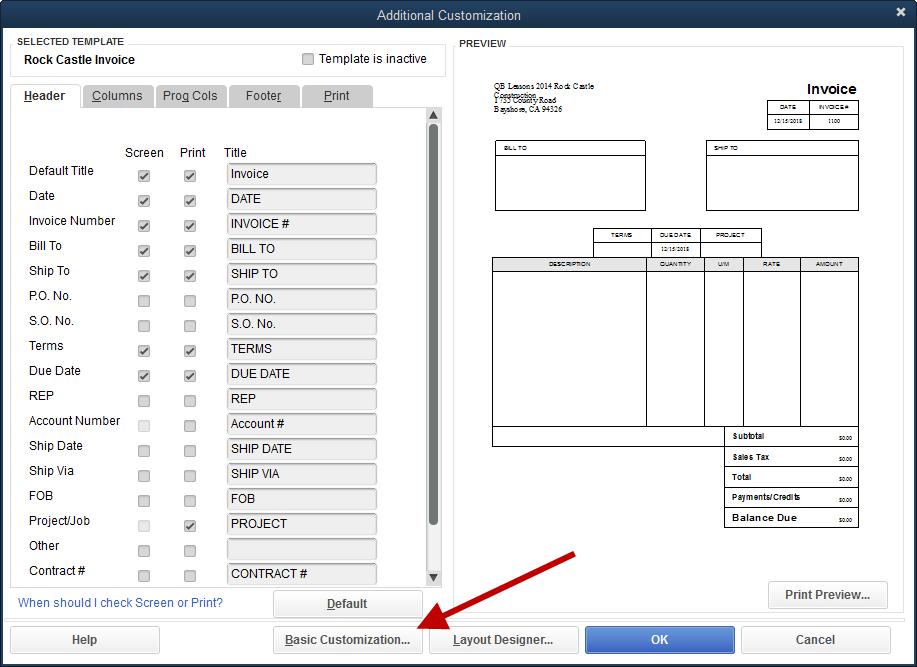
Above is the window that opens when selecting the Customize Data Layout icon. For this simple change, we will select Basic Customization.

The company phone number can be added by simply selecting the checkbox indicated.
This tells QuickBooks to add the selected information (company phone number), but it doesn’t tell it where to place that information on the printed form. For that, we will select the Layout Designer button seen at the bottom of the above screenshot.
Below is a screenshot of the layout designer, scrolled to the bottom of the invoice template, showing the new company telephone number data field.

The boxes can be selected and dragged, using the mouse, to the location desired.
In this example, we will drag the phone number boxes to appear just under the company address. Then we will delete the label field. That is the box containing the word Phone #.
The other field, the one filled in with 555-555-5555 sample data, is the data field. We will drag that into position and click on the Properties button at the top of the window.

From this window, we can create a number of changes. The font can be changed to match the address. The borders can be removed. The data can be left justified to match the margin of the address.
In the end, the address/phone number block will appear like this:
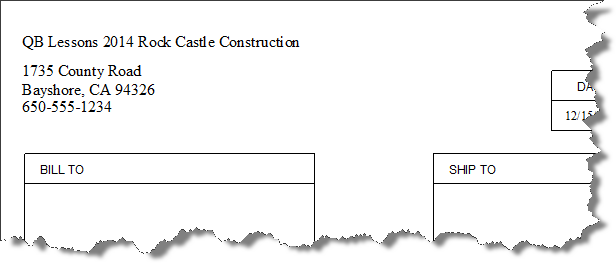
This is a small example of a simple change one can make to customize their invoice form. Using these tools, it’s possible to make extensive changes to a form in QuickBooks, like an invoice, that will give a completely individualized look to your business forms.