


Blog 
Click here to go back
It’s Time for a New QuickBooks Company File

In our last post we talked about shrinking your QuickBooks company file by using the Condense Data menu item. Today we’ll look at creating an entirely new QuickBooks file.
Usually, the creation of a new company file happens when the existing one becomes too large and performance, like looking up transactions or creating reports, is just too slow.
There are no hard limits to a QuickBooks company file, that is, you don’t need to worry that QuickBooks will stop working all of a sudden. This gives you time to plan. Once the decision is made, the best time for the new file is the beginning of a year.
A lot of information can come directly from the old file to the new. You can easily export/import list information like customers and their details from one company file to another.
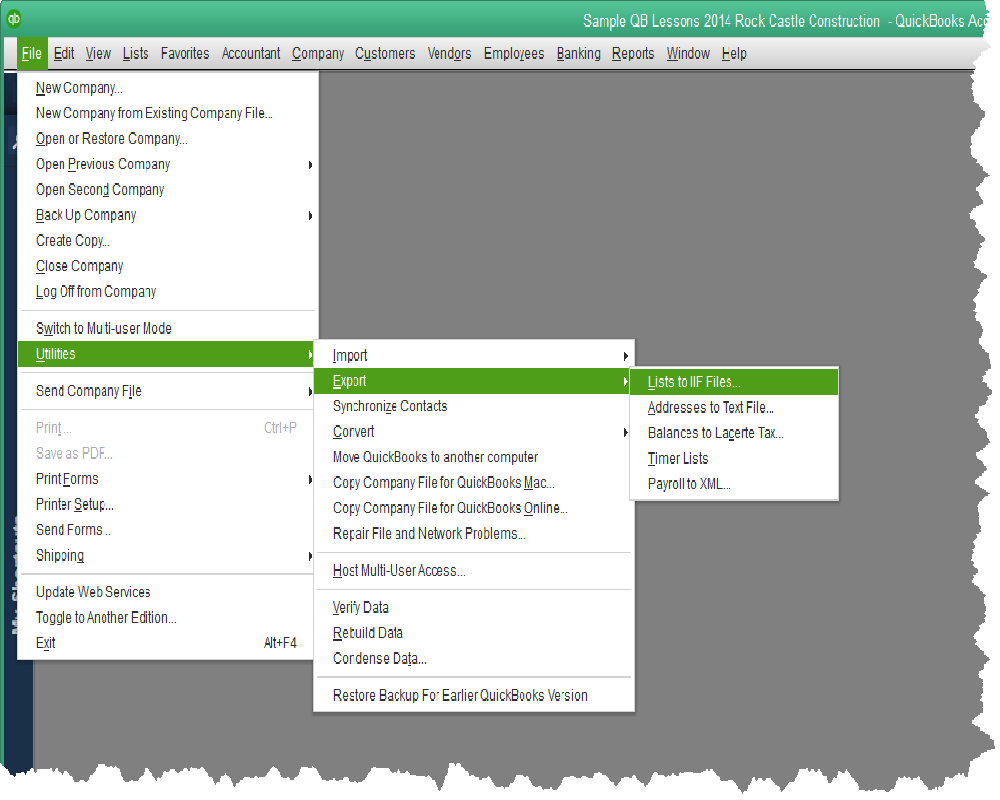
From the screenshot above, you can see the menu option to export lists. Once you make this choice, the following window opens.

You can select the lists you want to move to your new QuickBooks Company File. You can choose all of them, or only some of them. Those lists with checked boxes are the ones that we will export from our existing file and import into our new one.
Click okay in the above screen and QuickBooks will ask you for a name and a location to save the file. The export is almost instant. It takes only a second or two.
Now, open or create your new QuickBooks company file. There is an option under the File menu to create a New Company. There are a couple of different options to create a new company file, but you will be required to choose an industry type.

I like to choose Other/None as the industry type. For this type, QuickBooks will not create a suggested chart of accounts, only a couple of accounts it needs and will always create itself anyway. This way, if I’m importing my chart of accounts as one of my lists from the old company file, that’s what I’ll get. Not my accounts in addition to the suggested accounts QuickBooks created for a specific industry type.
Once you have the bare setup in the new company file, import the lists.
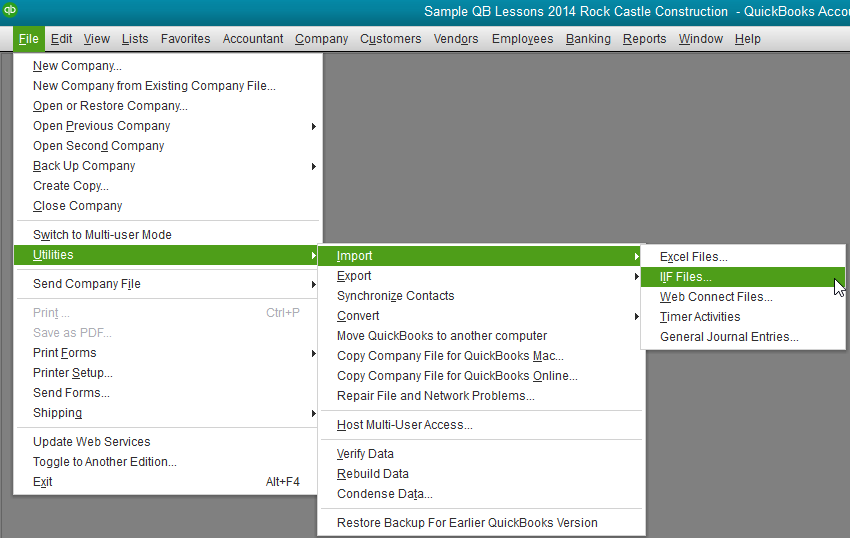
The process is very similar to exporting. You can see the menu steps in the graphic above. In the next step QuickBooks will want to know where the file you saved minutes ago is located. Navigate there, select it, and QuickBooks will import it. Just like exporting, it’s almost instantaneous.
That’s it. You have a new QuickBooks company file with no transactions, but all the same lists as you had before.
Admittedly, this is the simple part of the process. If you use accounts receivable and accounts payable, you want to enter all open invoices and bills into your new company file so you can receive payments and pay bills. If you have many of those, there are software tools that will help export/import those, so you don’t have to do all the work manually.
There are other beginning balances you will need to enter. Your bank balance, fixed assets and loan balances, for example.
If this is a solution you want to pursue and you have questions, give us a call and we can steer you in the right direction.