


Blog 
Click here to go back
Tips for QuickBooks Bank Reconciliation

Today’s post discusses several tips to make reconciling the bank account in QuickBooks easier.
First, navigate to the bank reconciliation screen from the Reconcile icon on the Home Page.
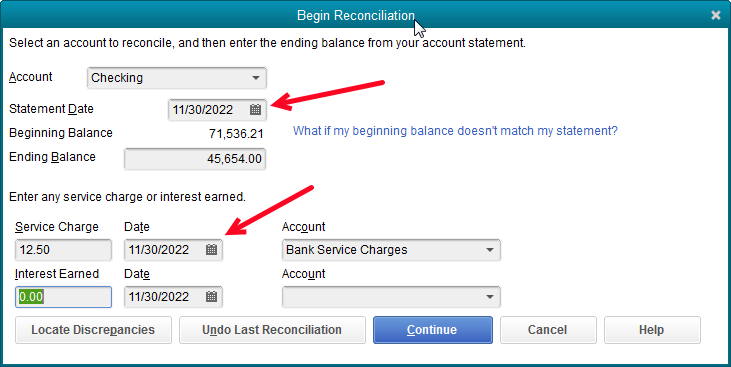
First tip, make sure your statement date and the date of any service charges or interest earned, agree.
Often these dates can become out-of-sync. Many QuickBooks users will click through this screen without even checking, unacquainted with what effects this may have on their QuickBooks file.
When the transaction date for the service charge is later than the statement date, the bank reconciliation report will not agree with the actual check register. While overall numbers are still correct, any accountant working on your numbers for reporting purposes will be sent looking for the cause of the discrepancy. For you, it’s needless billable time spent over a very small error.

One of the improvements in the bank reconciliation window from a few years back is the ability to sort the data from any of the columns. This works for either the check side or the deposit side.
It used to be that checks sorted by number only. With the increasing number of EFT and other type payments that did not align with the numbering sequence of paper checks, finding the checks became more difficult.
Now, the user can select to sort by check number, date (as in this example) or any of the other columns.
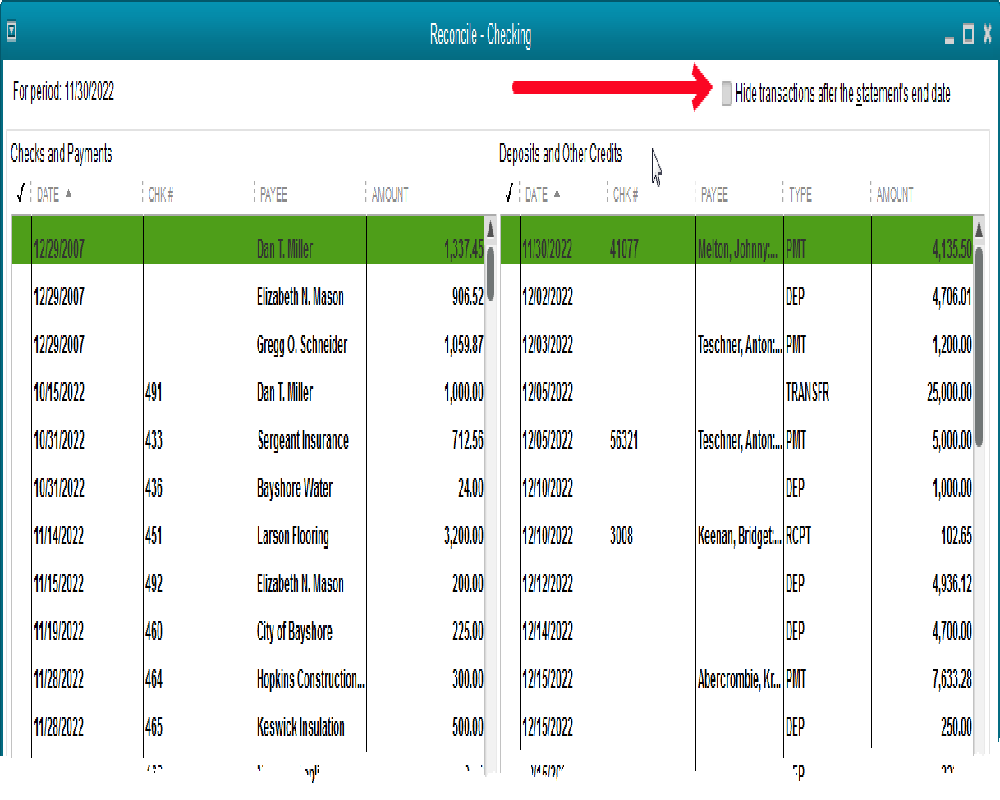
This one we’ve had for awhile. The checkbox to eliminate all transactions dated after the statement date. This results in a much shorter list of transactions to work with while finding items to clear.
Another tip. Especially for those companies that issue debit cards to certain employees. Being in the middle of a reconciliation and finding items that have not been entered into QuickBooks can be frustrating.
The check register can be opened and additional transactions added without closing the reconciliation window. It will automatically update. When you close the register, the new transactions will show in your list to be cleared.
Another frustration is items with small differences from the amount that cleared on the bank statement. From within the reconciliation window, items can be brought up in their original detail window with a double-click of the mouse.
This works best with regular checks. The amount can be edited. It will update immediately in the reconciliation window and be ready to mark as cleared.
In either of these last two cases, if the reconciliation needs to be put on hold for such an amount of time that the window needs to be closed, no worries.
You can click the Leave button. When you next return to the reconciliation window, all your work has been saved.

One last tip. Remember to continue correcting and reconciling till the Difference line is zero.