


Blog 
Click here to go back
Create Customized Receipts for Customer Payments
This feature was new with QuickBooks 2021. It allows the QuickBooks user to create a customized form to print a receipt for customers making a payment. Here’s how it works.
The starting point is accessing the Receive Payments screen either from the Home Page icon or the dropdown menu across the top. Once QuickBooks has opened that window, switch to the Formatting tab.
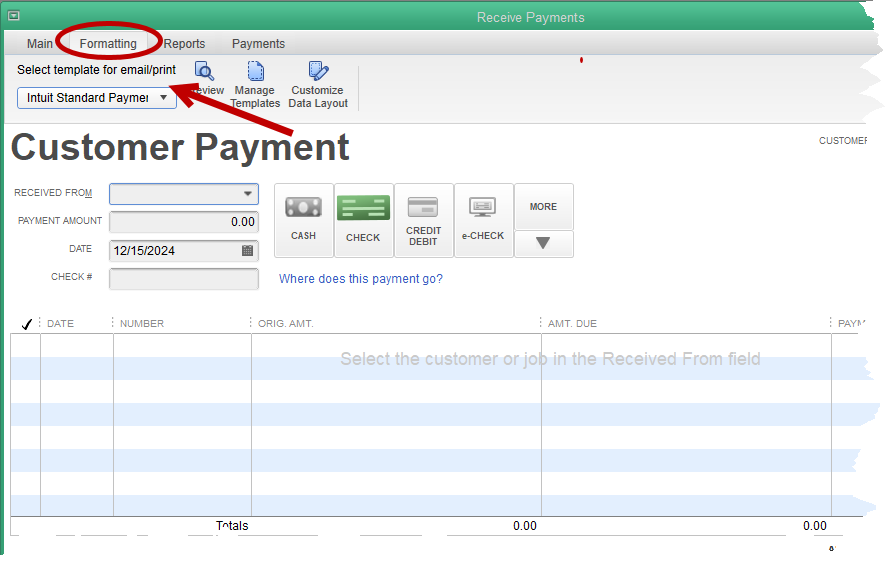
You can see in the above screenshot that the window now has a dropdown making multiple templates available, just like the Create Invoice screen.
On the Formatting tab, choose Manage Templates. You will need to copy the existing Intuit Standard Payment Receipt and then rename it to something you choose. In this demonstration, I chose the name Custom.
Once the name is created, you are taken to the Basic Customization screen.
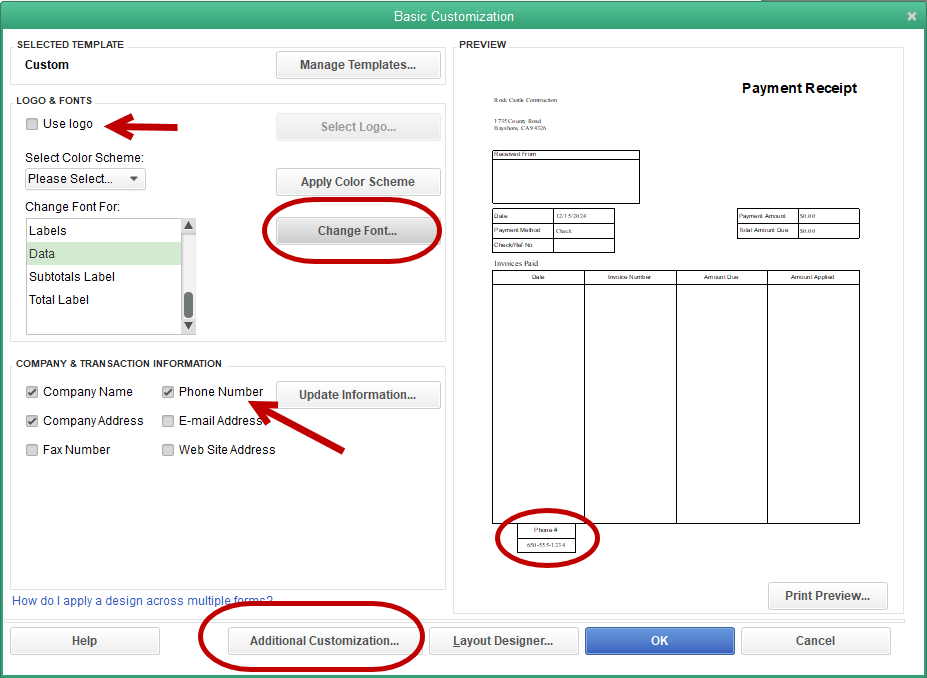
There are a host of available custom choices here. At this point the process becomes almost identical to that of customizing an invoice which we’ve covered in a different blog post.
A company logo can be added. The fonts of the printed form changed. Company information like telephone number included and so on.
In this screenshot, you can see the phone number was added. The addition shows in the lower left of the preview. QuickBooks doesn’t know where we want that piece of information yet. We’ll tell it before we finish this process.
Click on Additional Customization.
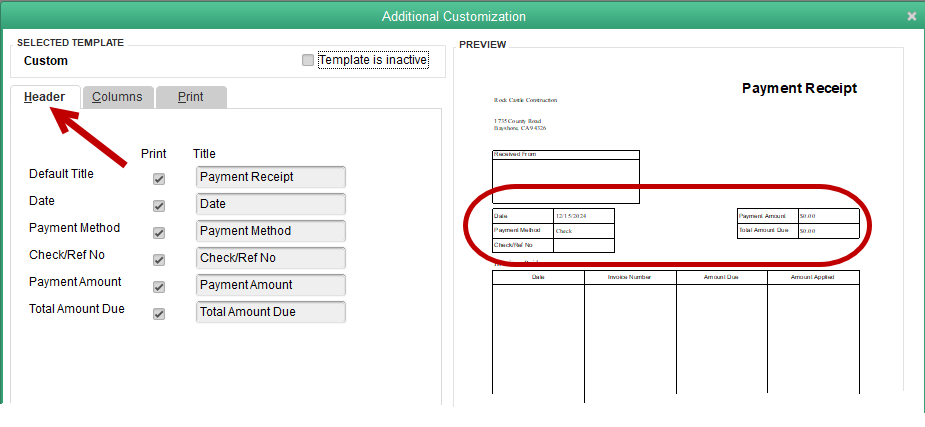
In this screen, you have three sections of the template to work on. The first is Header. You can see the various pieces of information available and the checkboxes telling QuickBooks we want that data on the Payment template.
The highlighted section on the Preview page shows where these selections end up showing on the printed form.
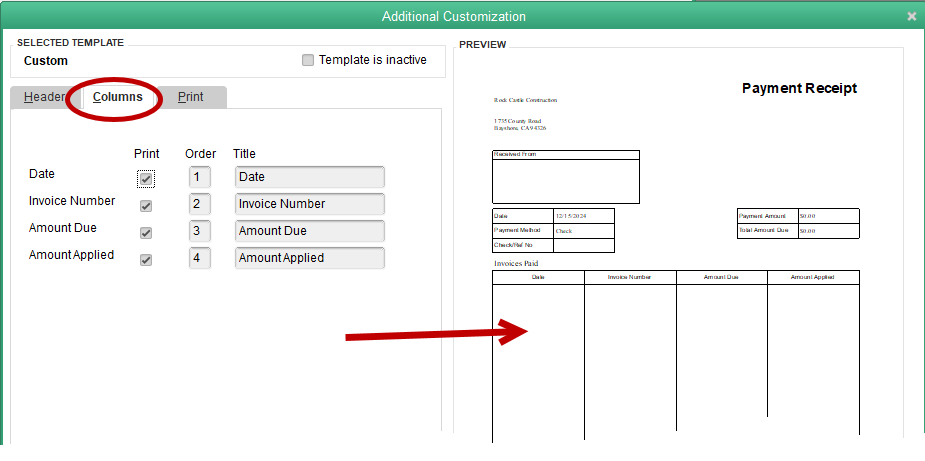
The next tab is Columns. You can change which columns print and in what order they appear on the finished template.
The Print tab isn’t used as often. There are options there to always print multiple copies, print to a special printer, etc.
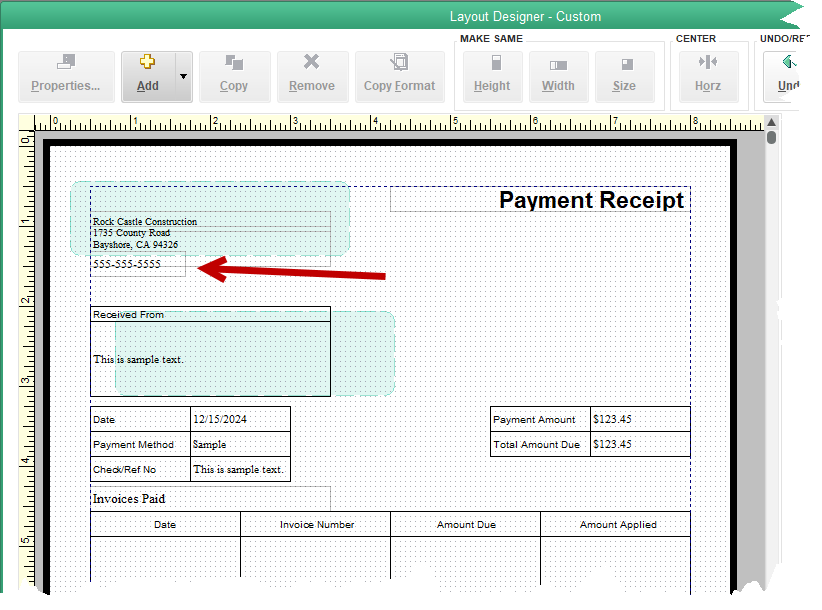
The above graphic shows the Layout Designer view of our custom template. The arrow indicates the phone number that was moved to appear just below the company address. The font was changed to match the rest of the form. Left-justified was selected so the number would line up on the left like the rest of the section. These actions are all available by selecting the Properties button in the upper left of the window.
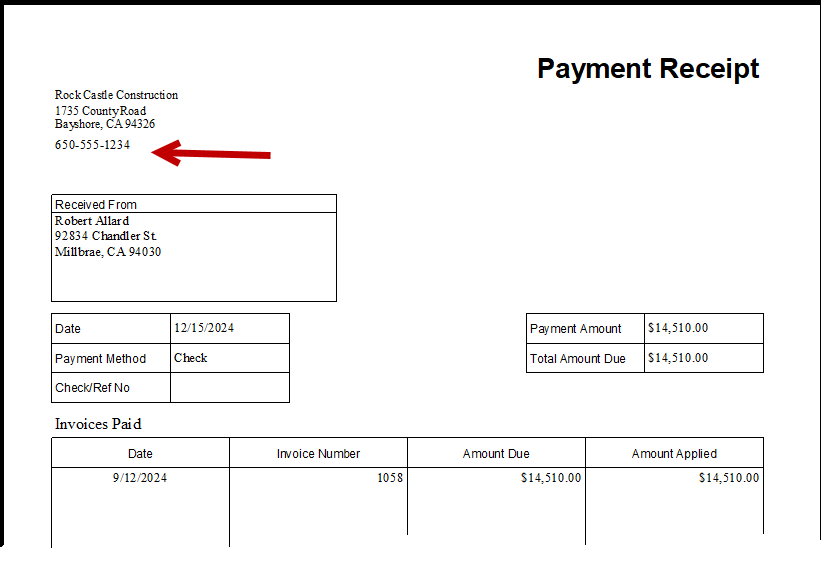
And above is our finished form.
The only change made in this demo was the phone number, but this is just an example. You know how to access this feature now and how it can be changed. Your receipt, should you need one, can look completely custom, unlike that of any other QuickBooks user.