


Blog 
Click here to go back
Automated Customer Statements
In QuickBooks, it’s possible to automate the process of sending customer statements. We’ve written about customer statements before. They’re an excellent tool to remind customers to pay outstanding balances. In recent years, QuickBooks has enabled this process to be automated.
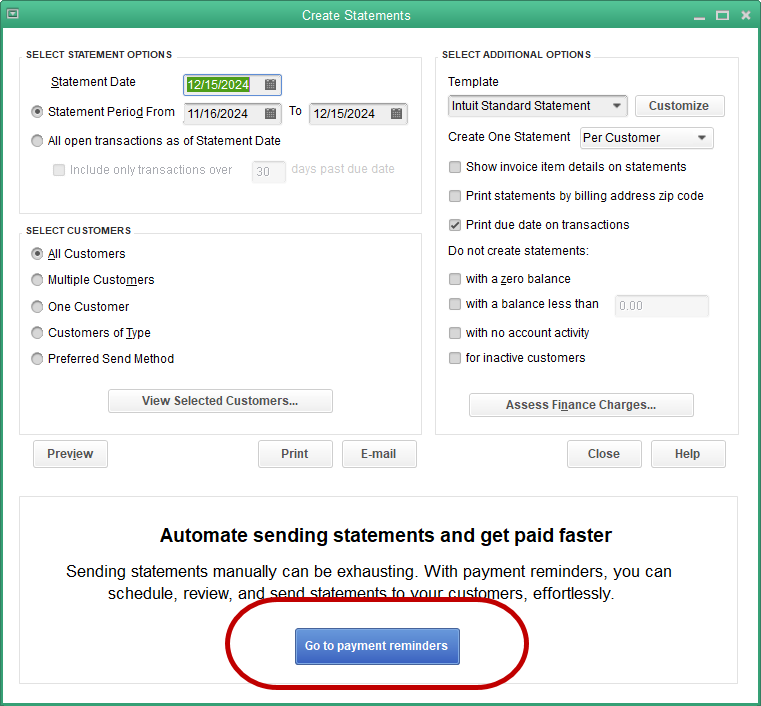
The screenshot below shows the screen used for creating customer statements. Click the blue ‘Go to payment reminders’ button.
The first step in automating the statement process is to create a schedule. Who is going to get statements and when?
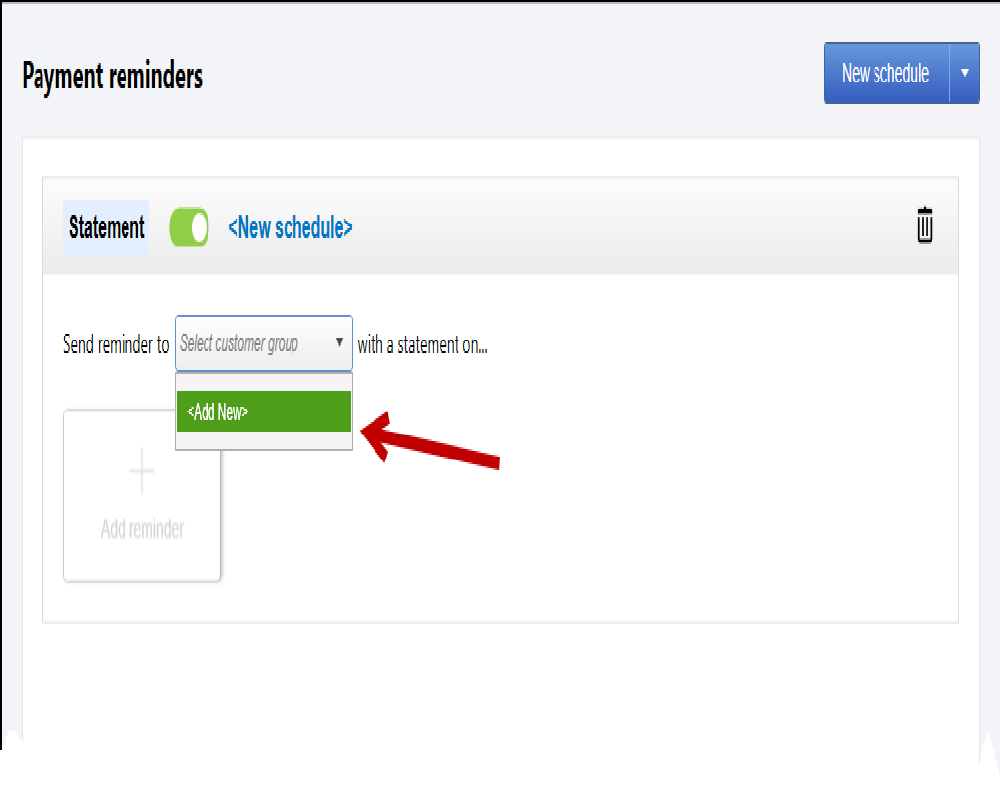
The first thing QuickBooks wants to know is, who? Who gets a statement?
In the screenshot above, the Add New refers to adding a new group of customers so you can instruct QuickBooks on how their statements should be handled.
Once you select the Add New button, QuickBooks will ask you to create a name for this group. So, examples might be Commercial, Retail, over $500 balance, etc.
In the screenshot below, we set the criteria so QuickBooks can determine who should be in this new group.
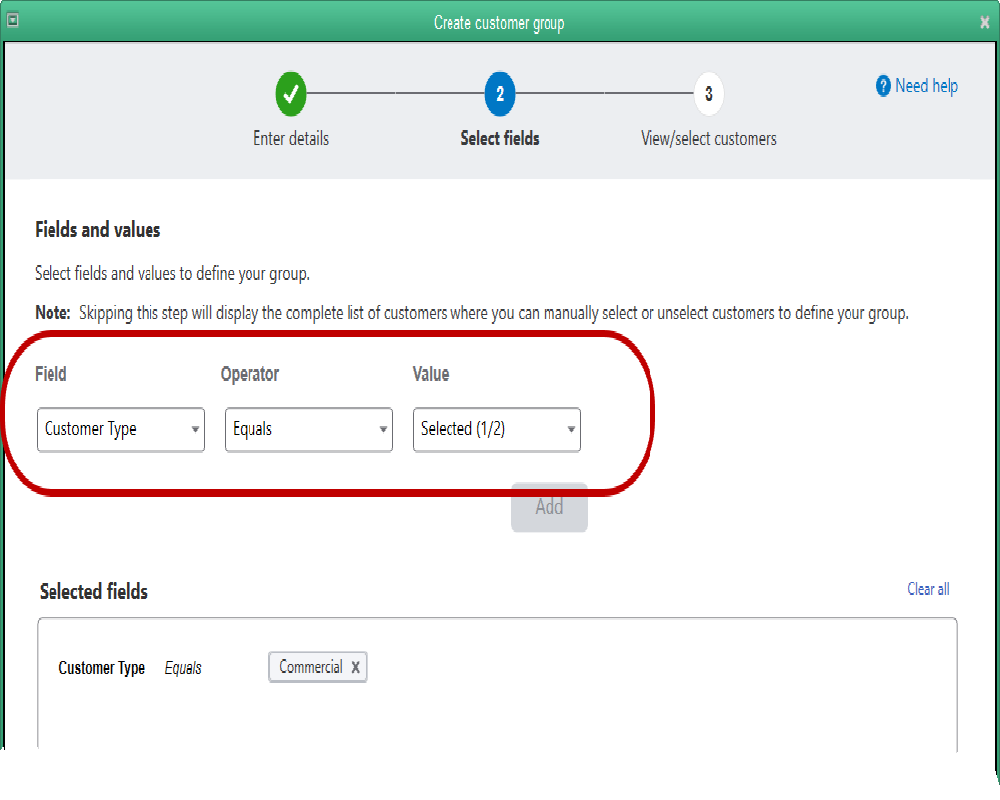
In the example above, Customer type has been selected as the field QuickBooks should look to in order to find the data to decide who should be in this group. There are quite a few other options.
You can choose customer balance, then in the Operator dropdown, choose “Greater Than”. This would enable you to choose all customers with an outstanding balance greater than $XXX.XX. That would become the customer group. It would change as customer balances change. At the appropriate time, QuickBooks will send those statements.
There are other options like all the customers with a certain Sales Rep, in a certain country, state, or using a certain sales tax item.
In our example, we’ll create a group of all the Customer Type = Commercial.
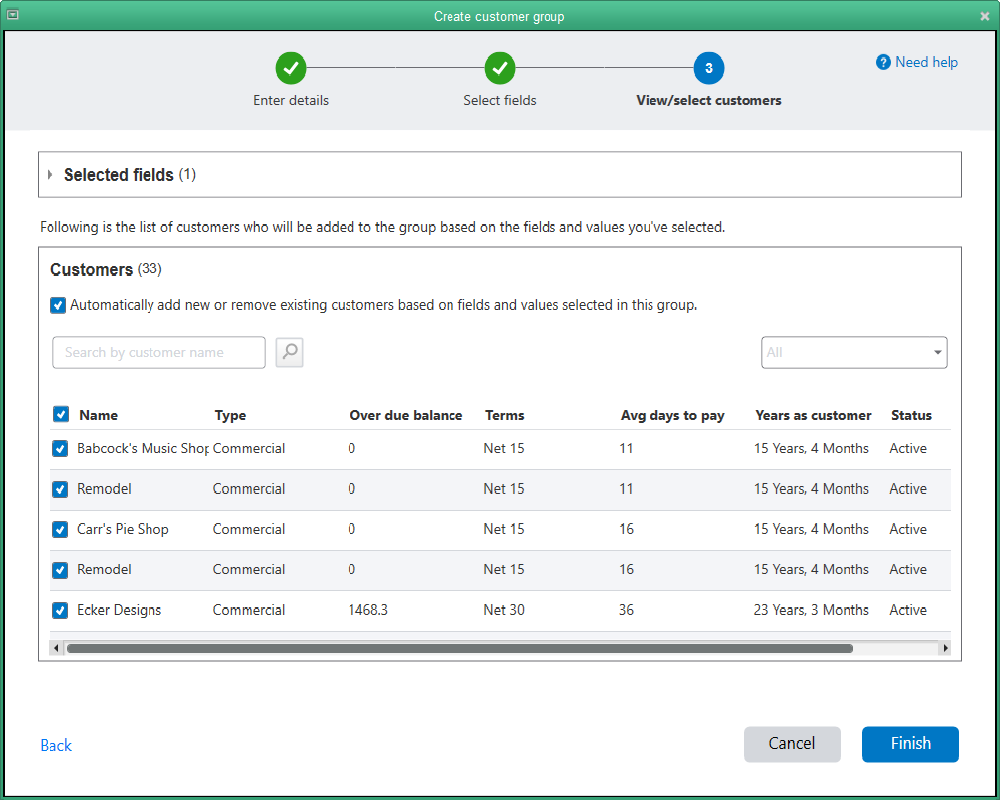
And there we are. All of Rock Castle Construction’s customers of the customer type commercial, are now in this group.
What’s next?
Clicking the Finish button opens a new window with the option to “Add reminder”. Choose that option. When you do, QuickBooks allows you to set a number of options about how your statements should appear.
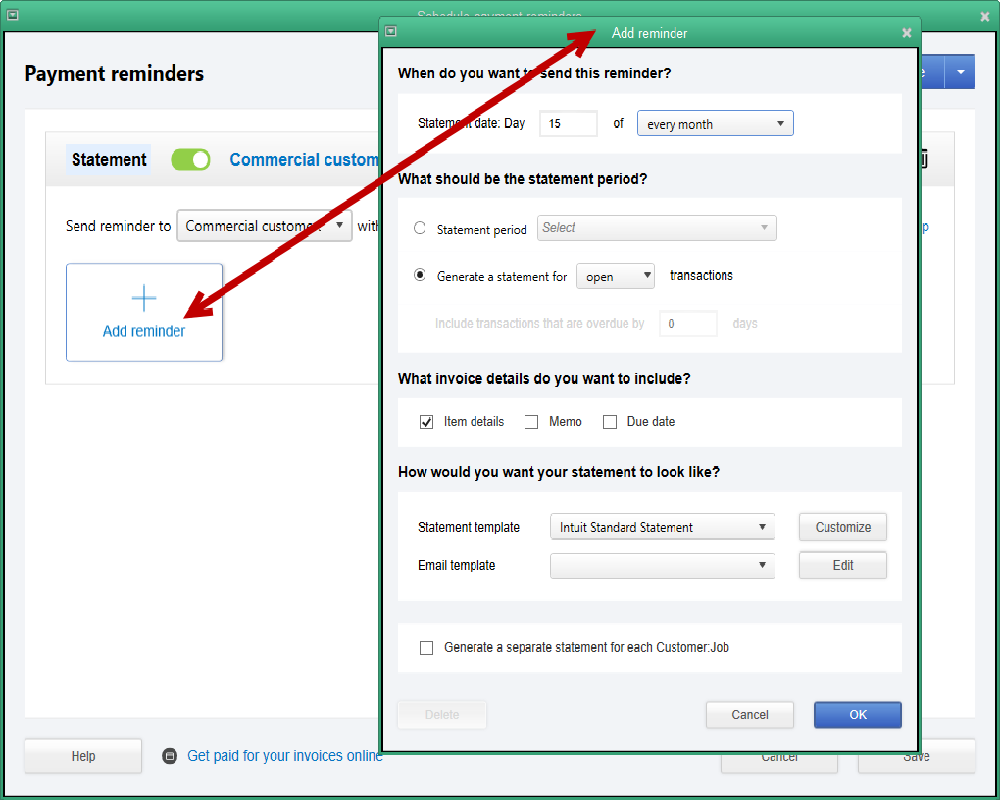
What day should QuickBooks choose? What statement period? Invoice details. What template? And so on.
One of the choices is email template.
Automated Payment Reminders will electronically send customer statements. Be sure you have that setup already with customer email addresses, how you want your email to appear, etc.
Then, on whatever schedule you chose, QuickBooks will automatically send those statements out for you. One less task you will need to spend time on.