


Blog 
Click here to go back
Sales Tax in QuickBooks
Part 1 – Setup
The sales tax feature in QuickBooks desktop uses several steps for setup. It also requires knowledge of multiple components of the program. Once setup is complete though, it functions as well or better than any program we know. Compare it to sales tax in QuickBooks Online where things get very challenging very quickly.
Sales Tax Items
Setting up sales tax in QuickBooks starts with an item.
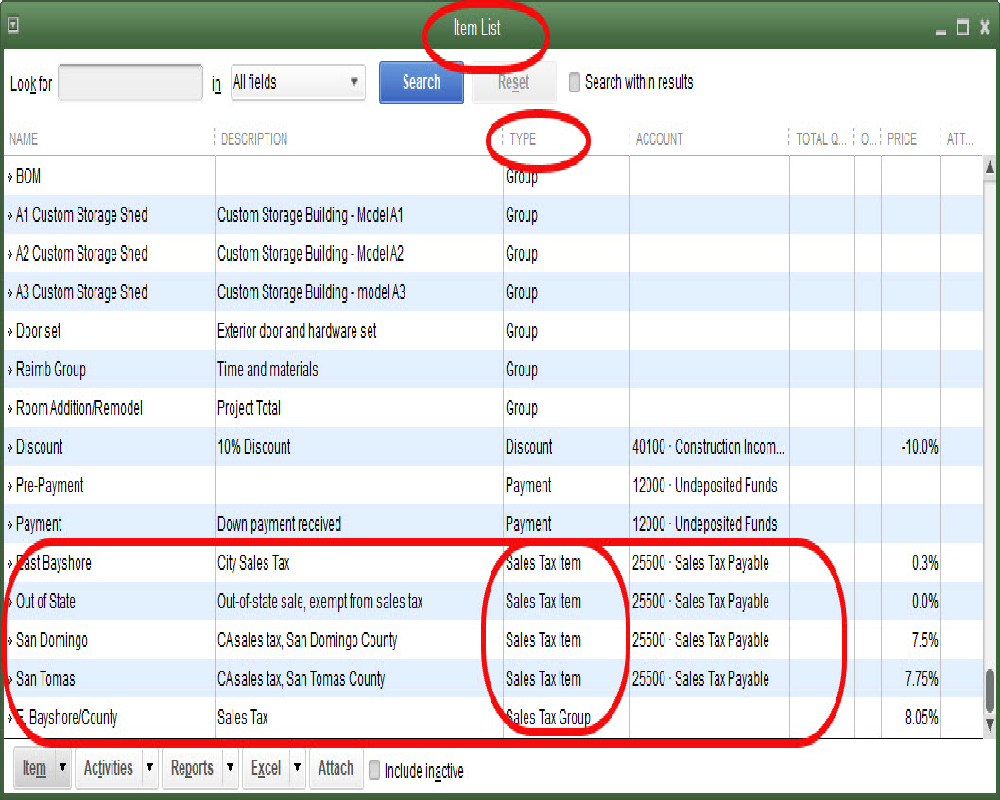
Typically, if the item list is in default order, the sales tax items will appear at the bottom of the list.
Creating or editing a sales tax item is straightforward. See the screenshot below.
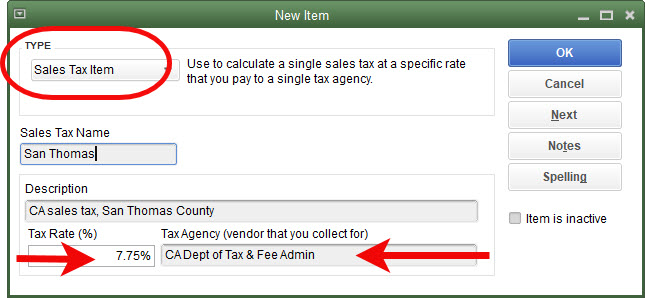
The item must be created as a sales tax item. The name and description can be your choice but use something that helps describe what this particular sales tax item is for. The sample file used in the screenshot is a good example.
Be sure the rate is correct as this obviously determines how much tax is charged the customer. Using the correct vendor is also important. Using an incorrect vendor will give you headaches when it comes time to pay the tax.
You may only need one sales tax item if all your customers are charged the same. Some will need multiple sales tax items as they may be delivering or working for customers in different sales tax jurisdictions with different rates.
Sales Tax Groups
If you have a sharp eye, you may have noticed that in the first graphic showing the item list is an item with the type, Sales Tax Group.
Sales taxes are usually made up of several components. In California, the largest portion goes to the state, another part to the county, some to the city, and in some cases, another small portion to a special district created by the voters.
Other states may have some, all, or none of these splits. If they have some, there are places where at least one of the components of the total tax rate must be paid to a different vendor. The purpose of groups is to allow each component piece of the tax to be created, selecting the vendor it should be paid to. Then, the components can be grouped to be used on customer invoices as one tax rate, which is all QuickBooks can use on a single invoice.
In California, we are fortunate that all components of the sales tax amount are payable to the state. So, with one vendor, we only need one sales tax items for the entire amount.
Sales Tax Codes
This can sound confusing to someone new to setting up sales tax in QuickBooks, but the software has both sales tax items and sales tax codes. As we saw in the earlier section, sales tax items tell QuickBooks, among other things, what the sales tax rate is and who (the vendor) to pay that sales tax to.
Sales tax codes tell QuickBooks if something is taxable or not. Expanding on this feature, it will tell us why something is not taxable as well.
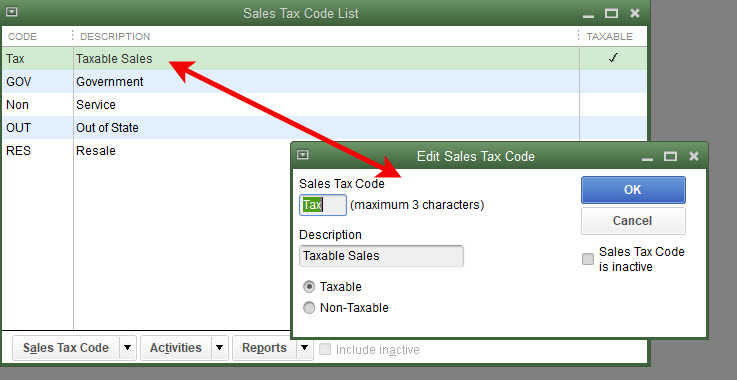
Navigating to Lists->Sales Tax Code List will access the list of sales tax codes. In the above graphic, the edit window for Tax has been opened by double-clicking on the list entry.
The codes GOV, RES, and OUT were added to the sample file. The description for Non was changed from Nontaxable to Service. All these additions and changes will be better understood later as we use them in transactions and reports.
Preferences
There are several preference settings for sales taxes. Note that, if you have sales tax ‘turned on’, QuickBooks wants a ‘most common’ sales tax item selected. Some QuickBooks users may only have one sales tax item, so this is an easy choice for them. Even if you have more than one sales tax item, QuickBooks will not do much with this preference once you tell it what sales tax items should be used with each customer.
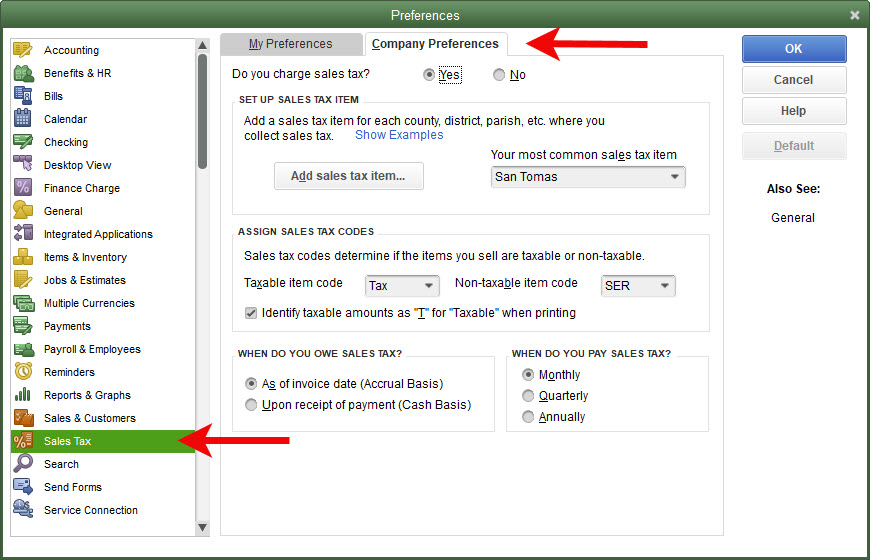
The “When do you owe sales tax” is an important question. Most states will regulate this so check with the appropriate agency in your state.
In California, the “As of invoice date (Accrual Basis)” is mandated. You must pay sales tax to the state based on the date of the sale, regardless of when you receive payment from the customer.
What About Nontaxable Sales?
We need to tell QuickBooks what is taxable and what is not.
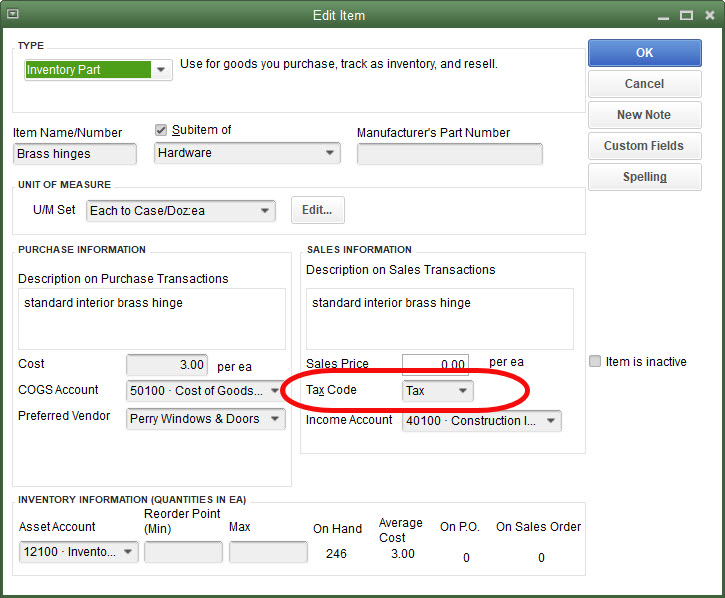
Brass hinges are a taxable item.
Charges for labor, like framing are not.
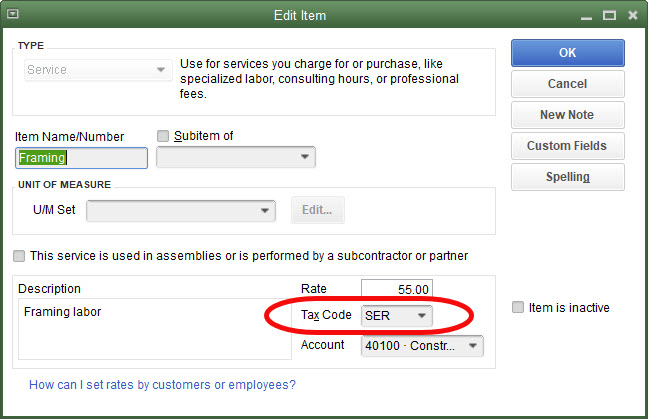
That’s all QuickBooks needs in order to determine whether an item should be charged sales tax or not. That can change in certain situations, like who purchased the brass hinges, but ordinarily brass hinges will be taxable so that’s how we will set them up in QuickBooks.
What About Nontaxable Customers?
Some businesses may have both taxable and nontaxable customers. Retail customers pay sales tax, others registered as re-sellers, may not be charged sales tax.
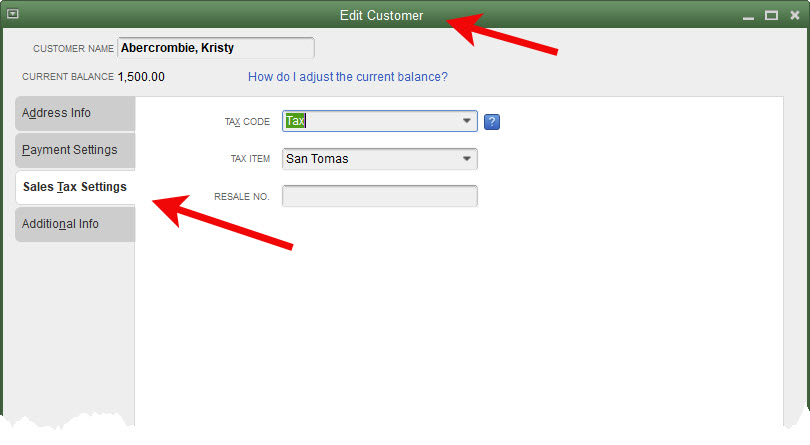
Edit the customer. Choose the Sales Tax Settings tab on the left. Choose the appropriate sales tax code.
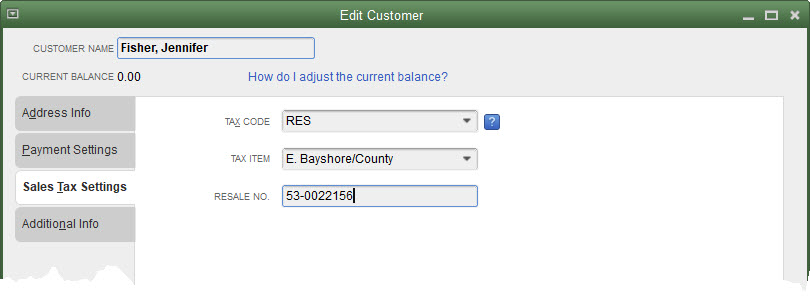
Here is where you will use one of those custom sales tax codes shown in the earlier screenshot. If Kristy Abercrombie were a customer that did not pay sales tax because she purchased our products to re-sell later to her customers, I would choose the Resale (RES) sales tax code shown earlier.
Let’s set up a resale customer to use later when we get to reporting.
Next post, we’ll test our setup.