


Blog 
Click here to go back
Sales Tax in QuickBooks Part 2
Part 2 - Testing Our Setup
Let’s create a couple of invoices to test our setup.
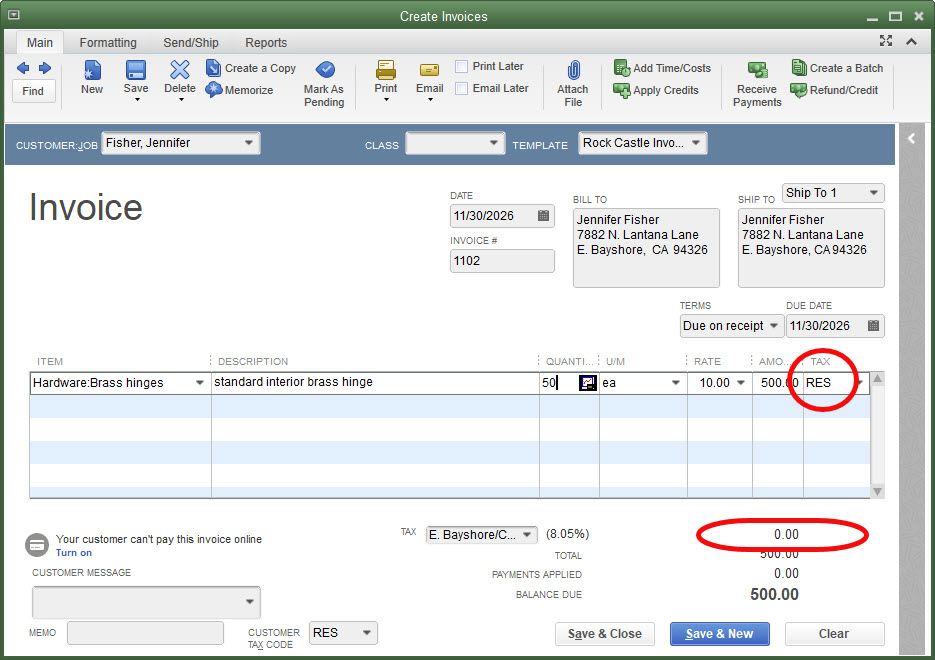
Jennifer Fisher is the customer we edited, telling QuickBooks she was ordinarily a resale customer so should not be charged sales tax. As a result, when we choose Jennifer as the customer on an invoice, QuickBooks automatically marks the sale with the RES (Resale) sales tax code and makes the sales tax amount zero.
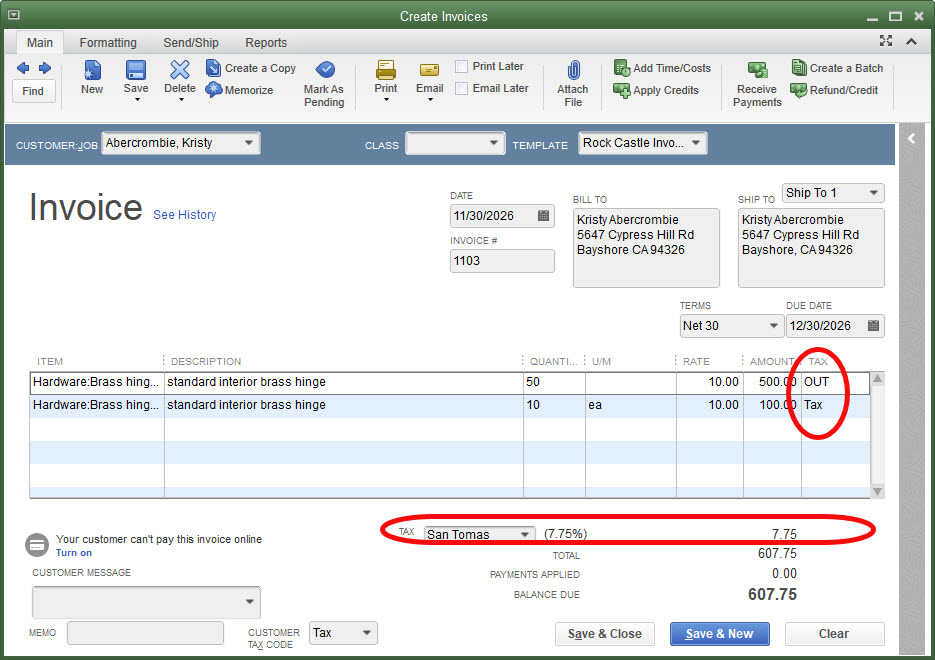
Here is an invoice you will never create. It’s done this way to demonstrate the sales tax feature.
The first line of the invoice is a sale of $500. The sales tax code has been changed, that can be done manually on each line of the invoice if desired, to OUT, designating this as a nontaxable out of state sale.
The send line of the invoice is a $100 sale marked Taxable. The sales tax line shows sales tax of $7.75, which is the tax amount for line two of the invoice. No tax is generated from the first line.
Sales Tax Reports
The Sales Tax Liability report is the most common report used for reporting sales tax. Reports->Vendors & Payables->Sales Tax Liability.
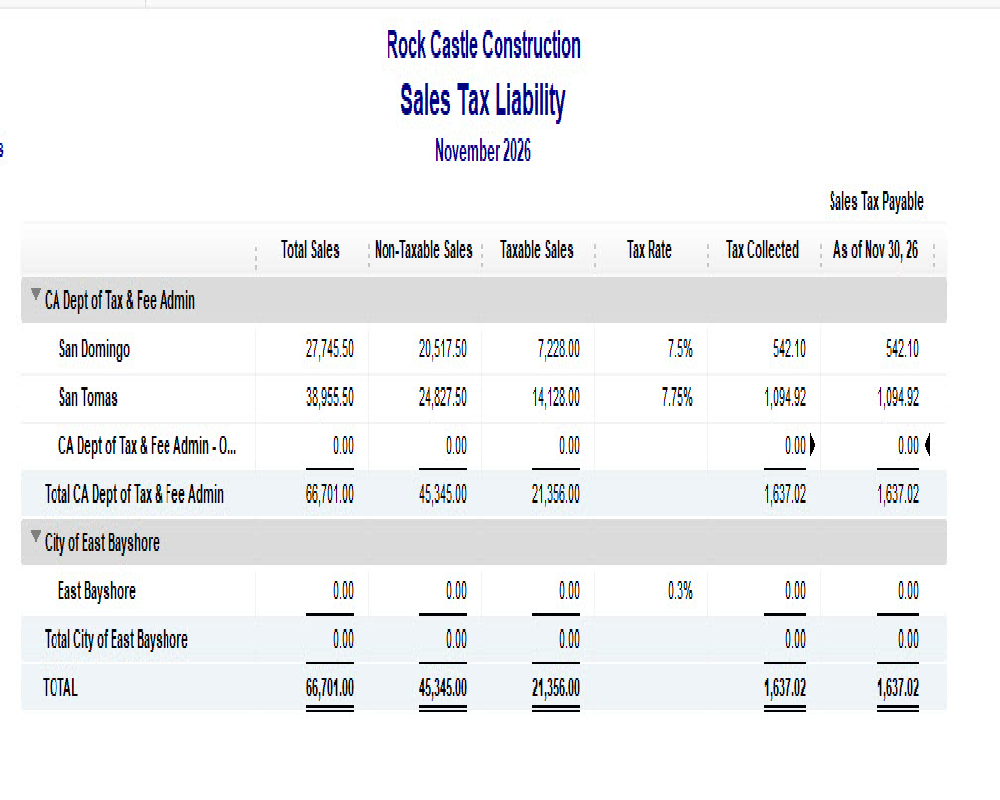
The report is pretty straightforward. It shows sales taxable and non-taxable and in which sales tax jurisdiction the sale was made.
Anyone who has ever completed a sales tax return knows one must report not only how many dollars in sales were nontaxable, but why those sales were not taxable. This is where the multiple sales tax codes come in.
The next screenshot is the Sales Tax Revenue Summary report.
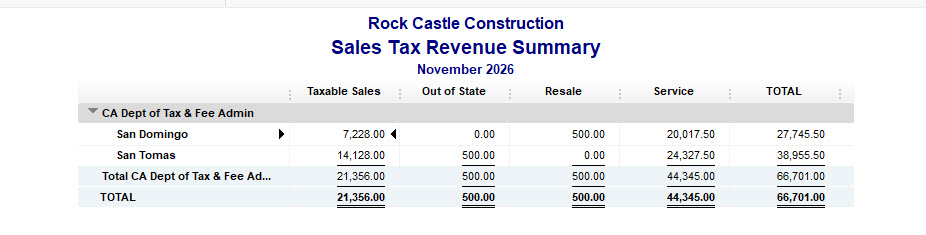
If you do the math, you will find nontaxable sales of $45,345. Same as the sales tax liability report. Only now we know that $500 is for out of state customers, $500 is for a resale customer, and the remaining $44,345 is for nontaxable services.
That’s the value of the multiple sales tax codes and the sales tax revenue summary report.
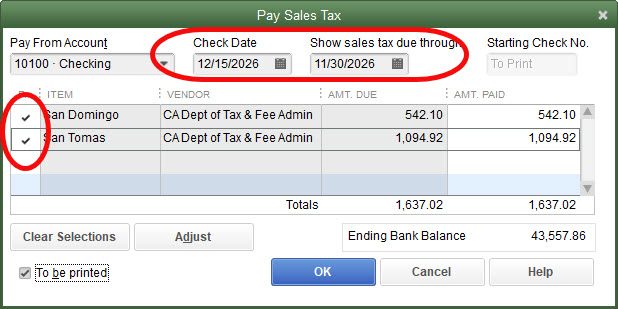
Pay Sales Tax
Similar to the way payroll taxes should always be paid using the Payroll Center, QuickBooks provides a way to pay sales taxes. This is less critical than payroll taxes but does help the program keep track of what is owed. Especially if the tax must be paid to different vendors.
Navigate to Vendors->Sales Tax->Pay Sales Tax and you can use the following window to pay sales tax. Make sure the proper dates are selected. Check the tax being paid, often this will be all the lines in the window, then click OK to create the check.
Armed with this information, you should be ready to tackle sales tax with QuickBooks.